Fried Squash Blossoms Bengali Style

IMG_9377.JPG

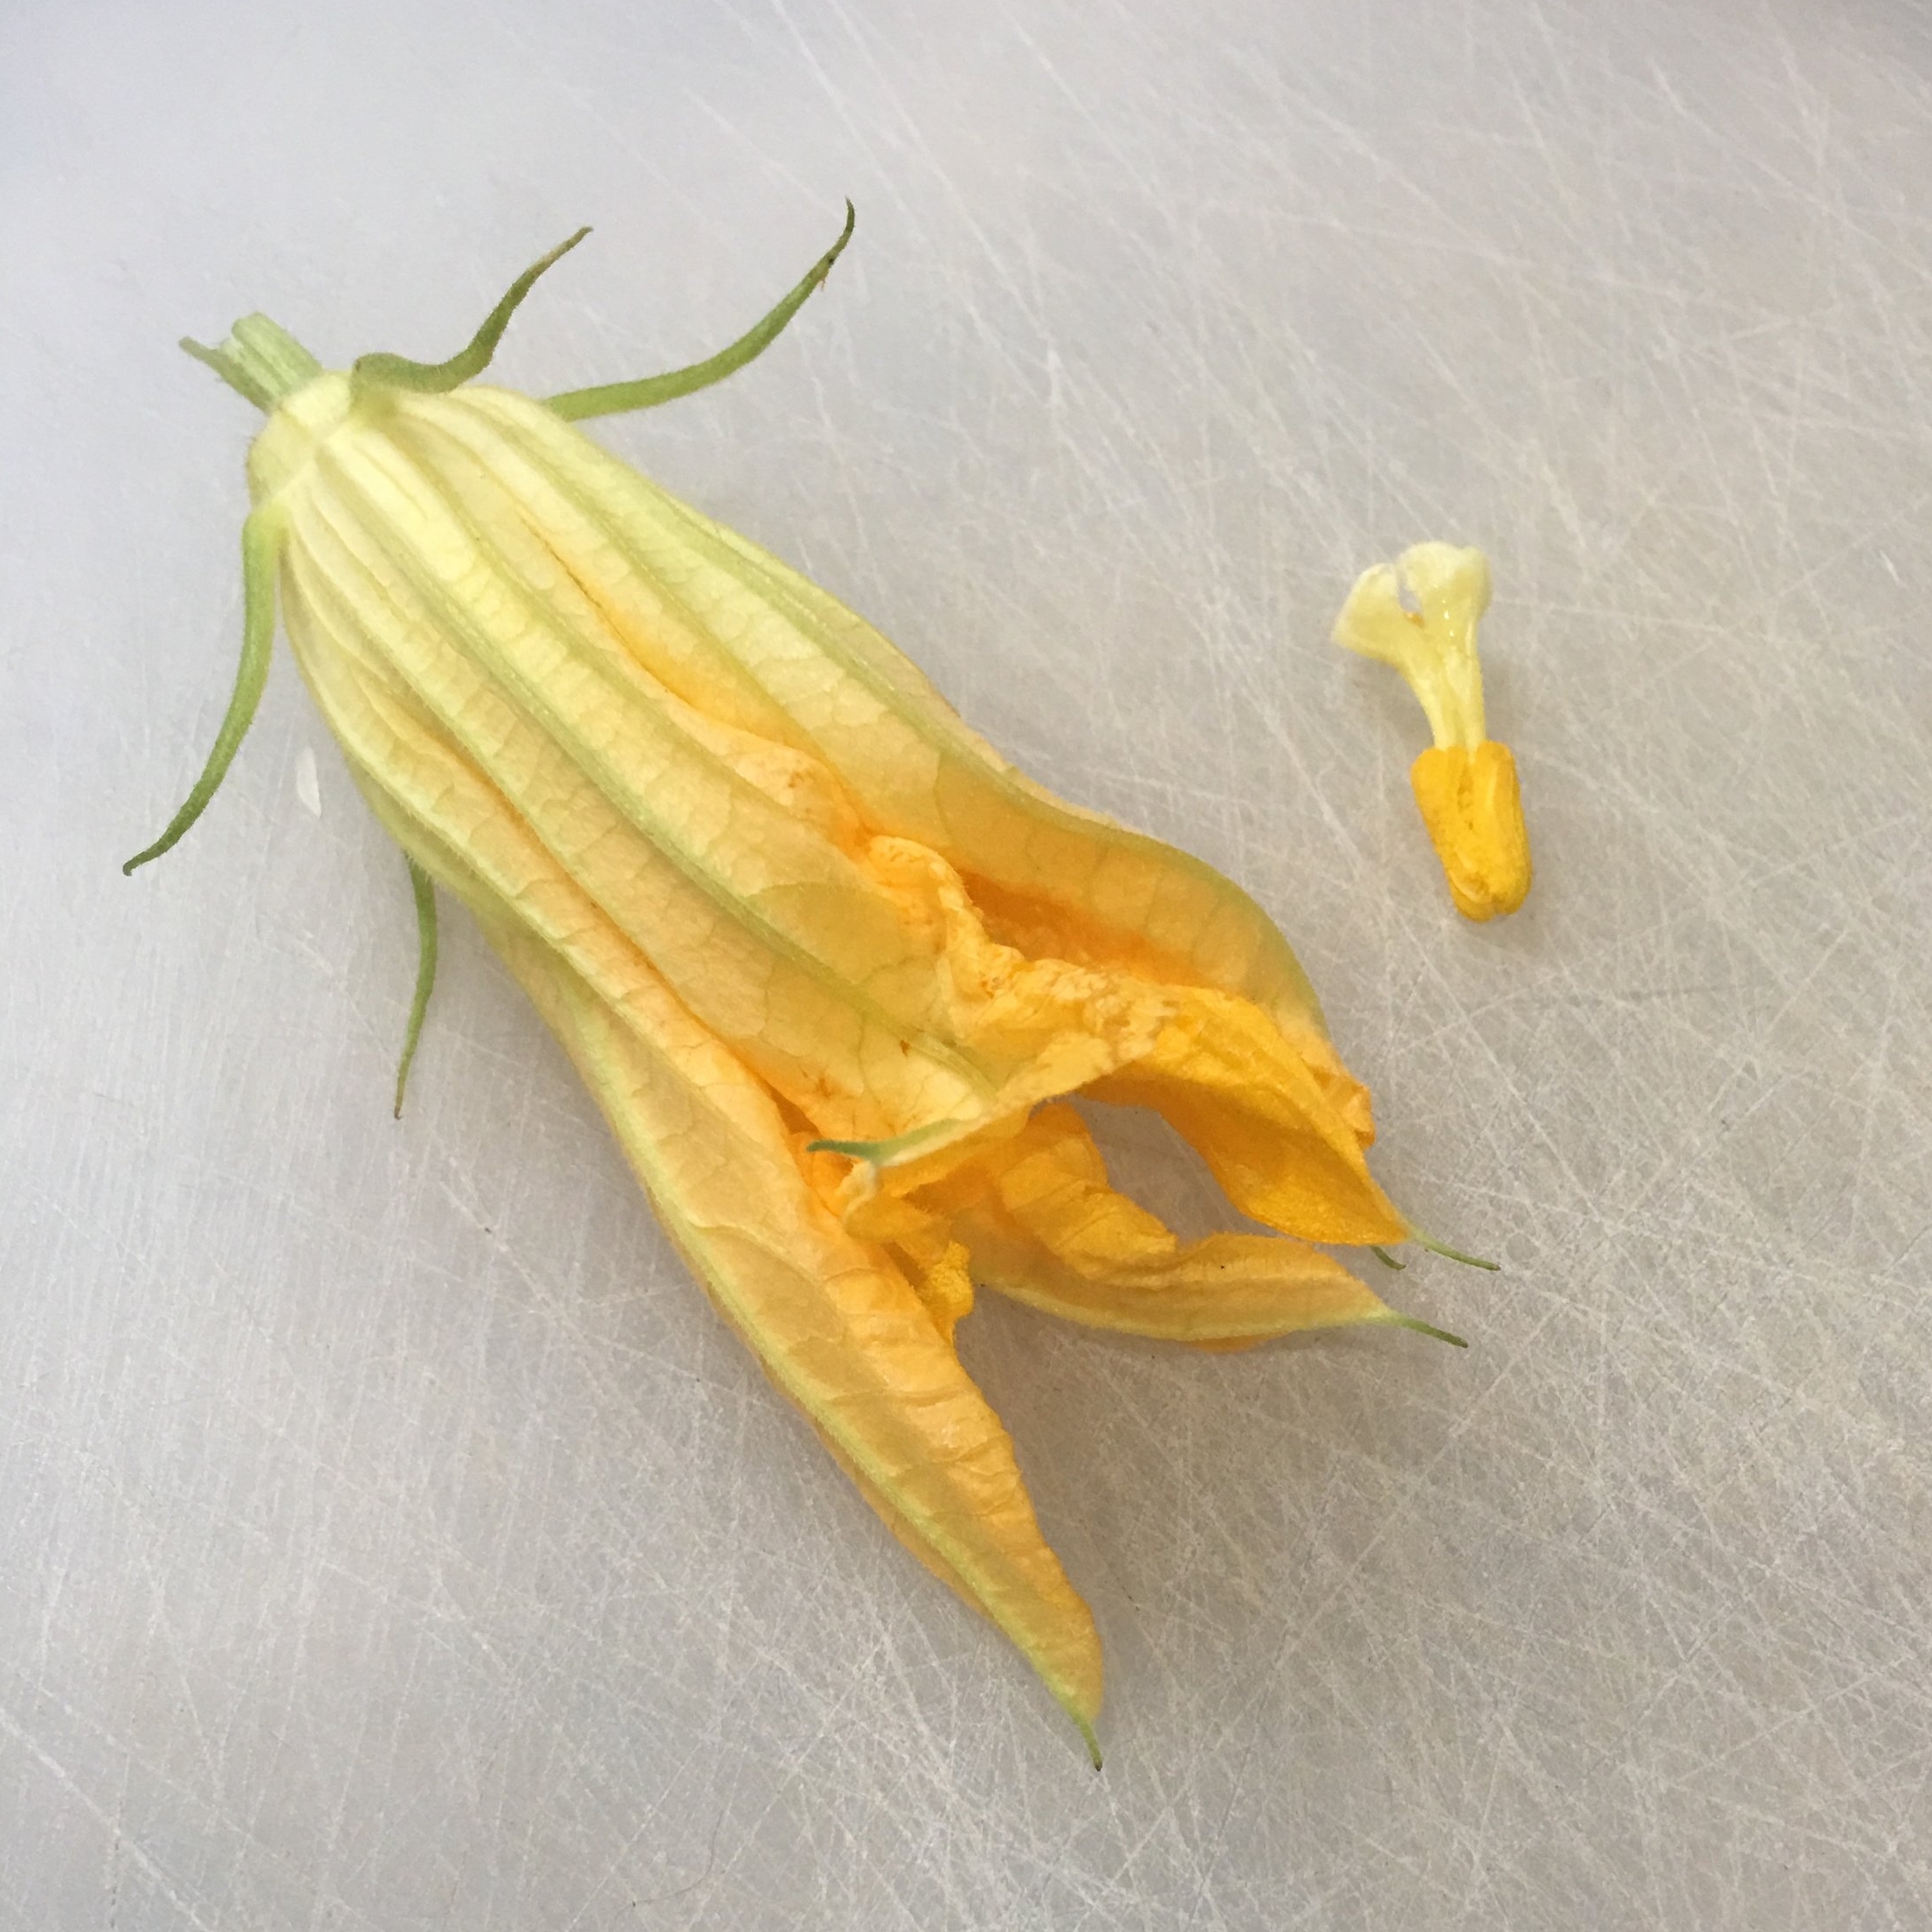
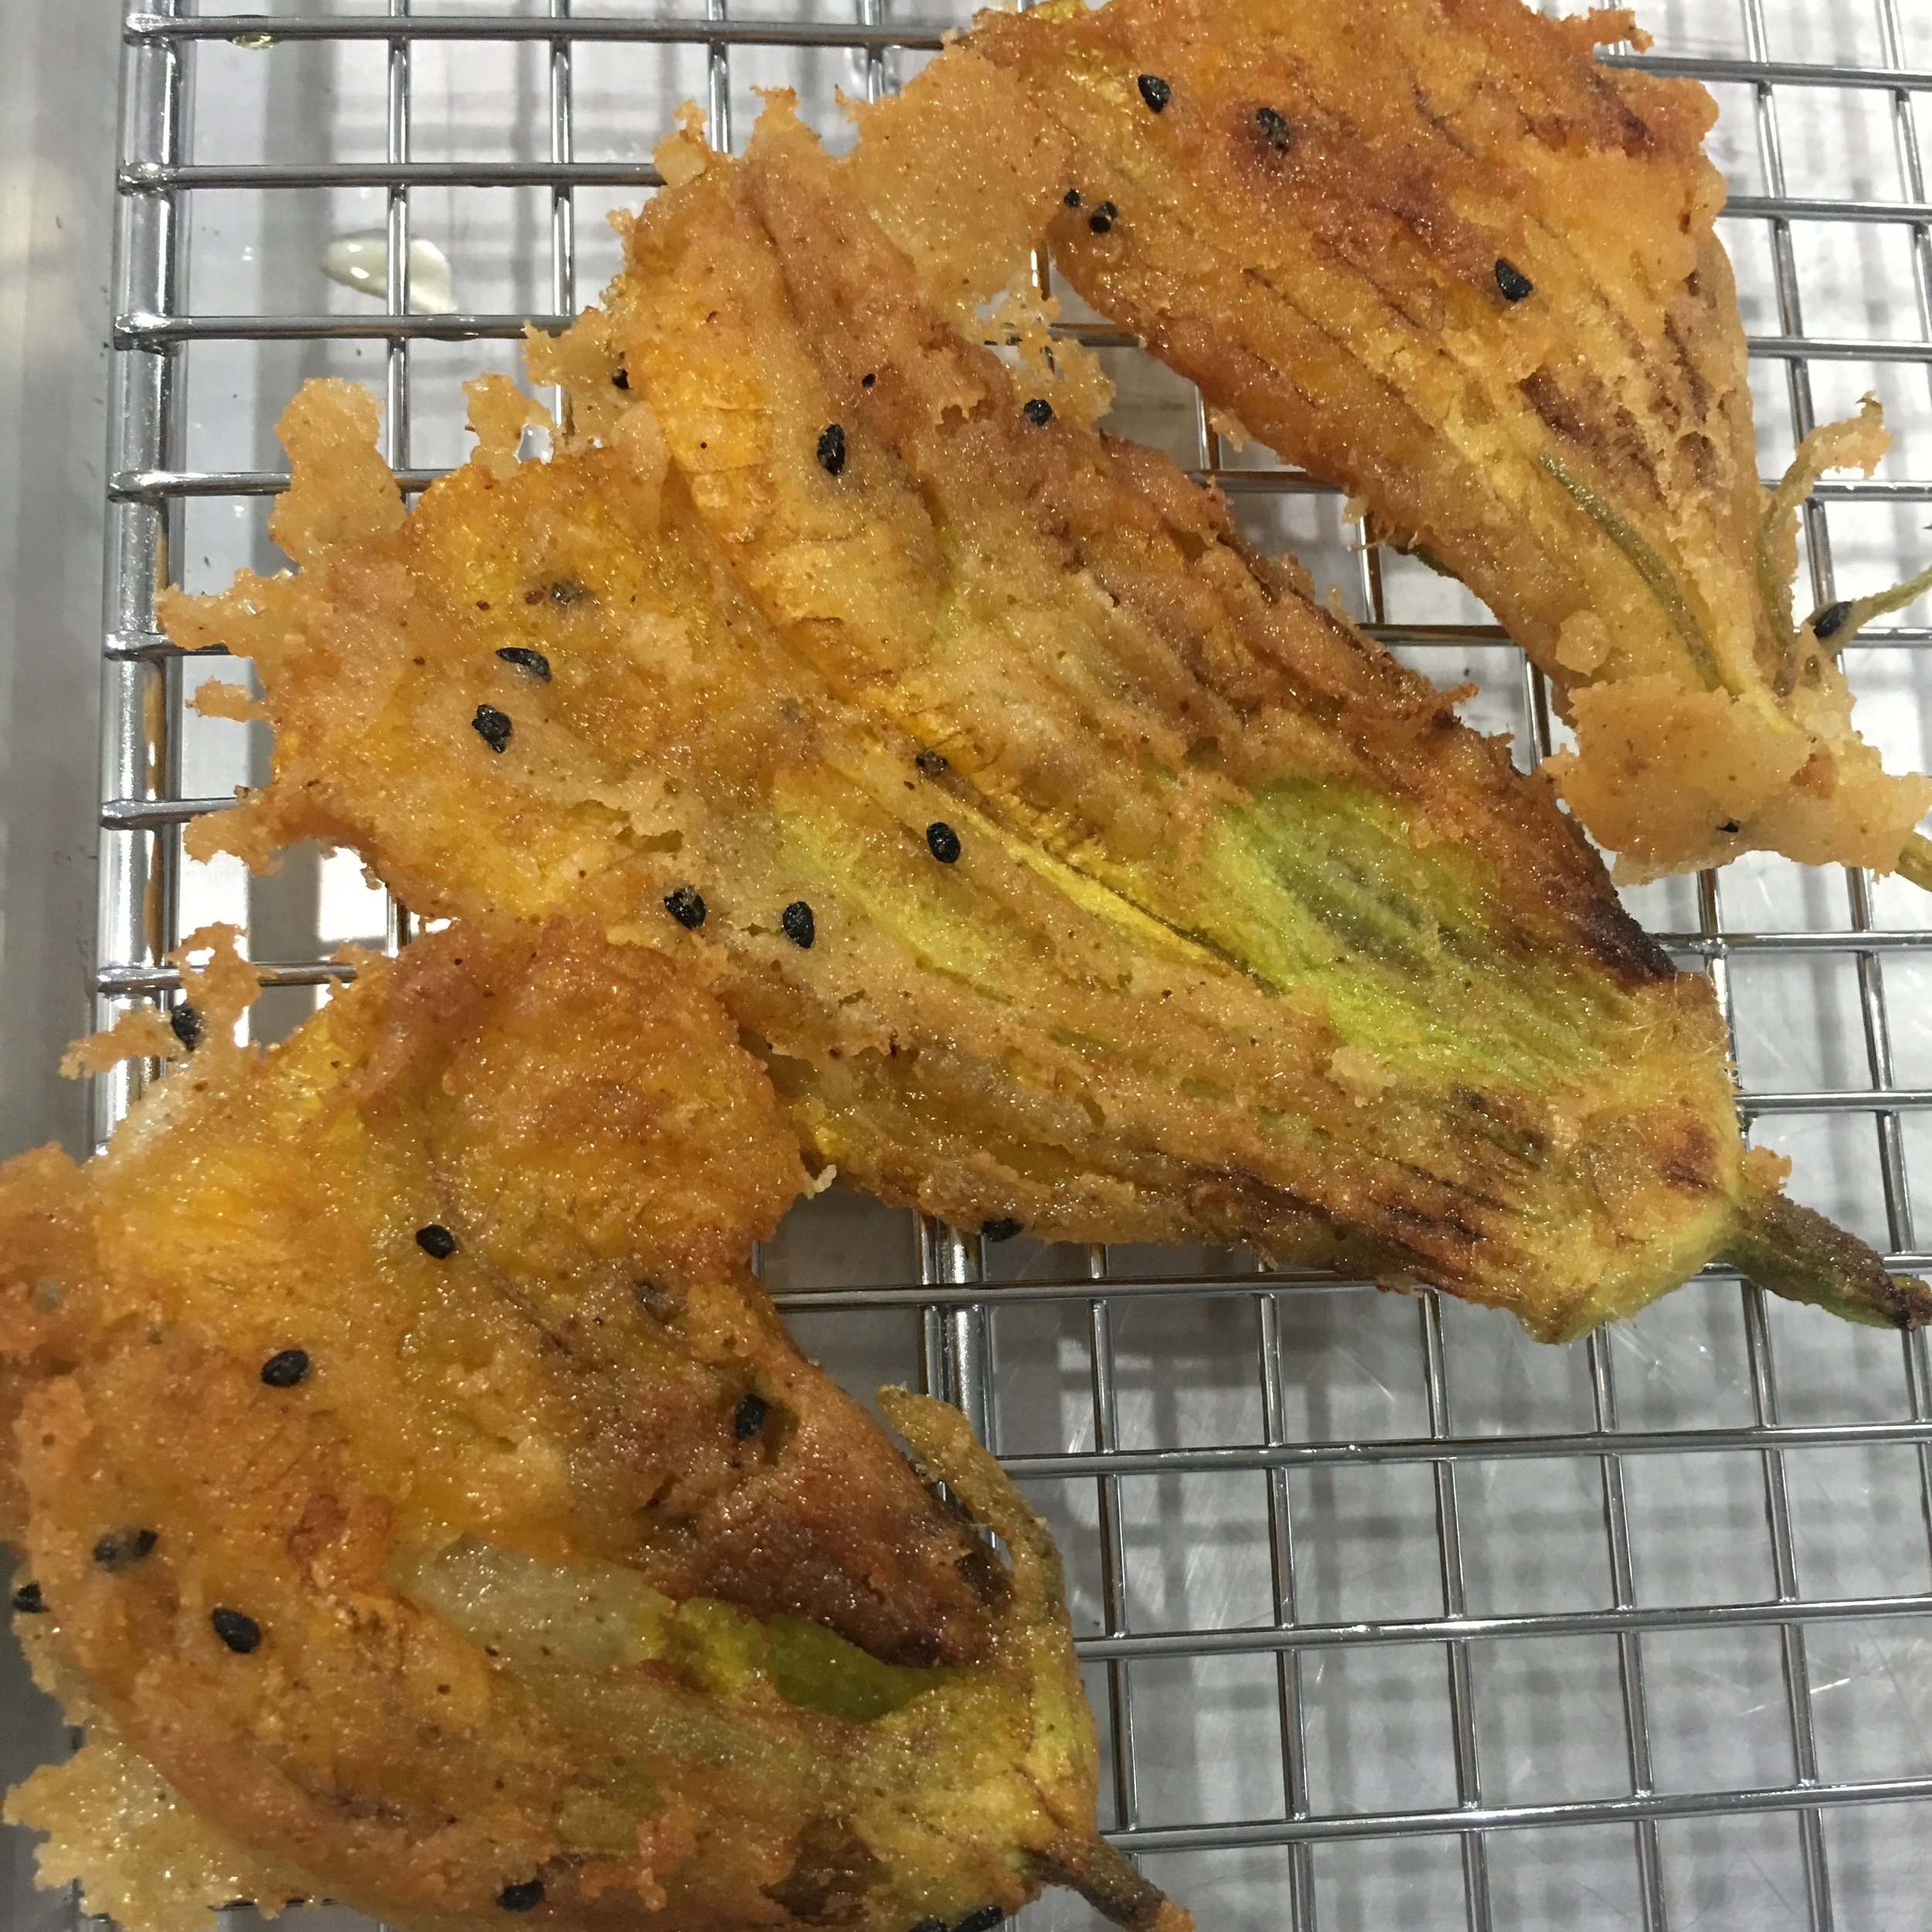
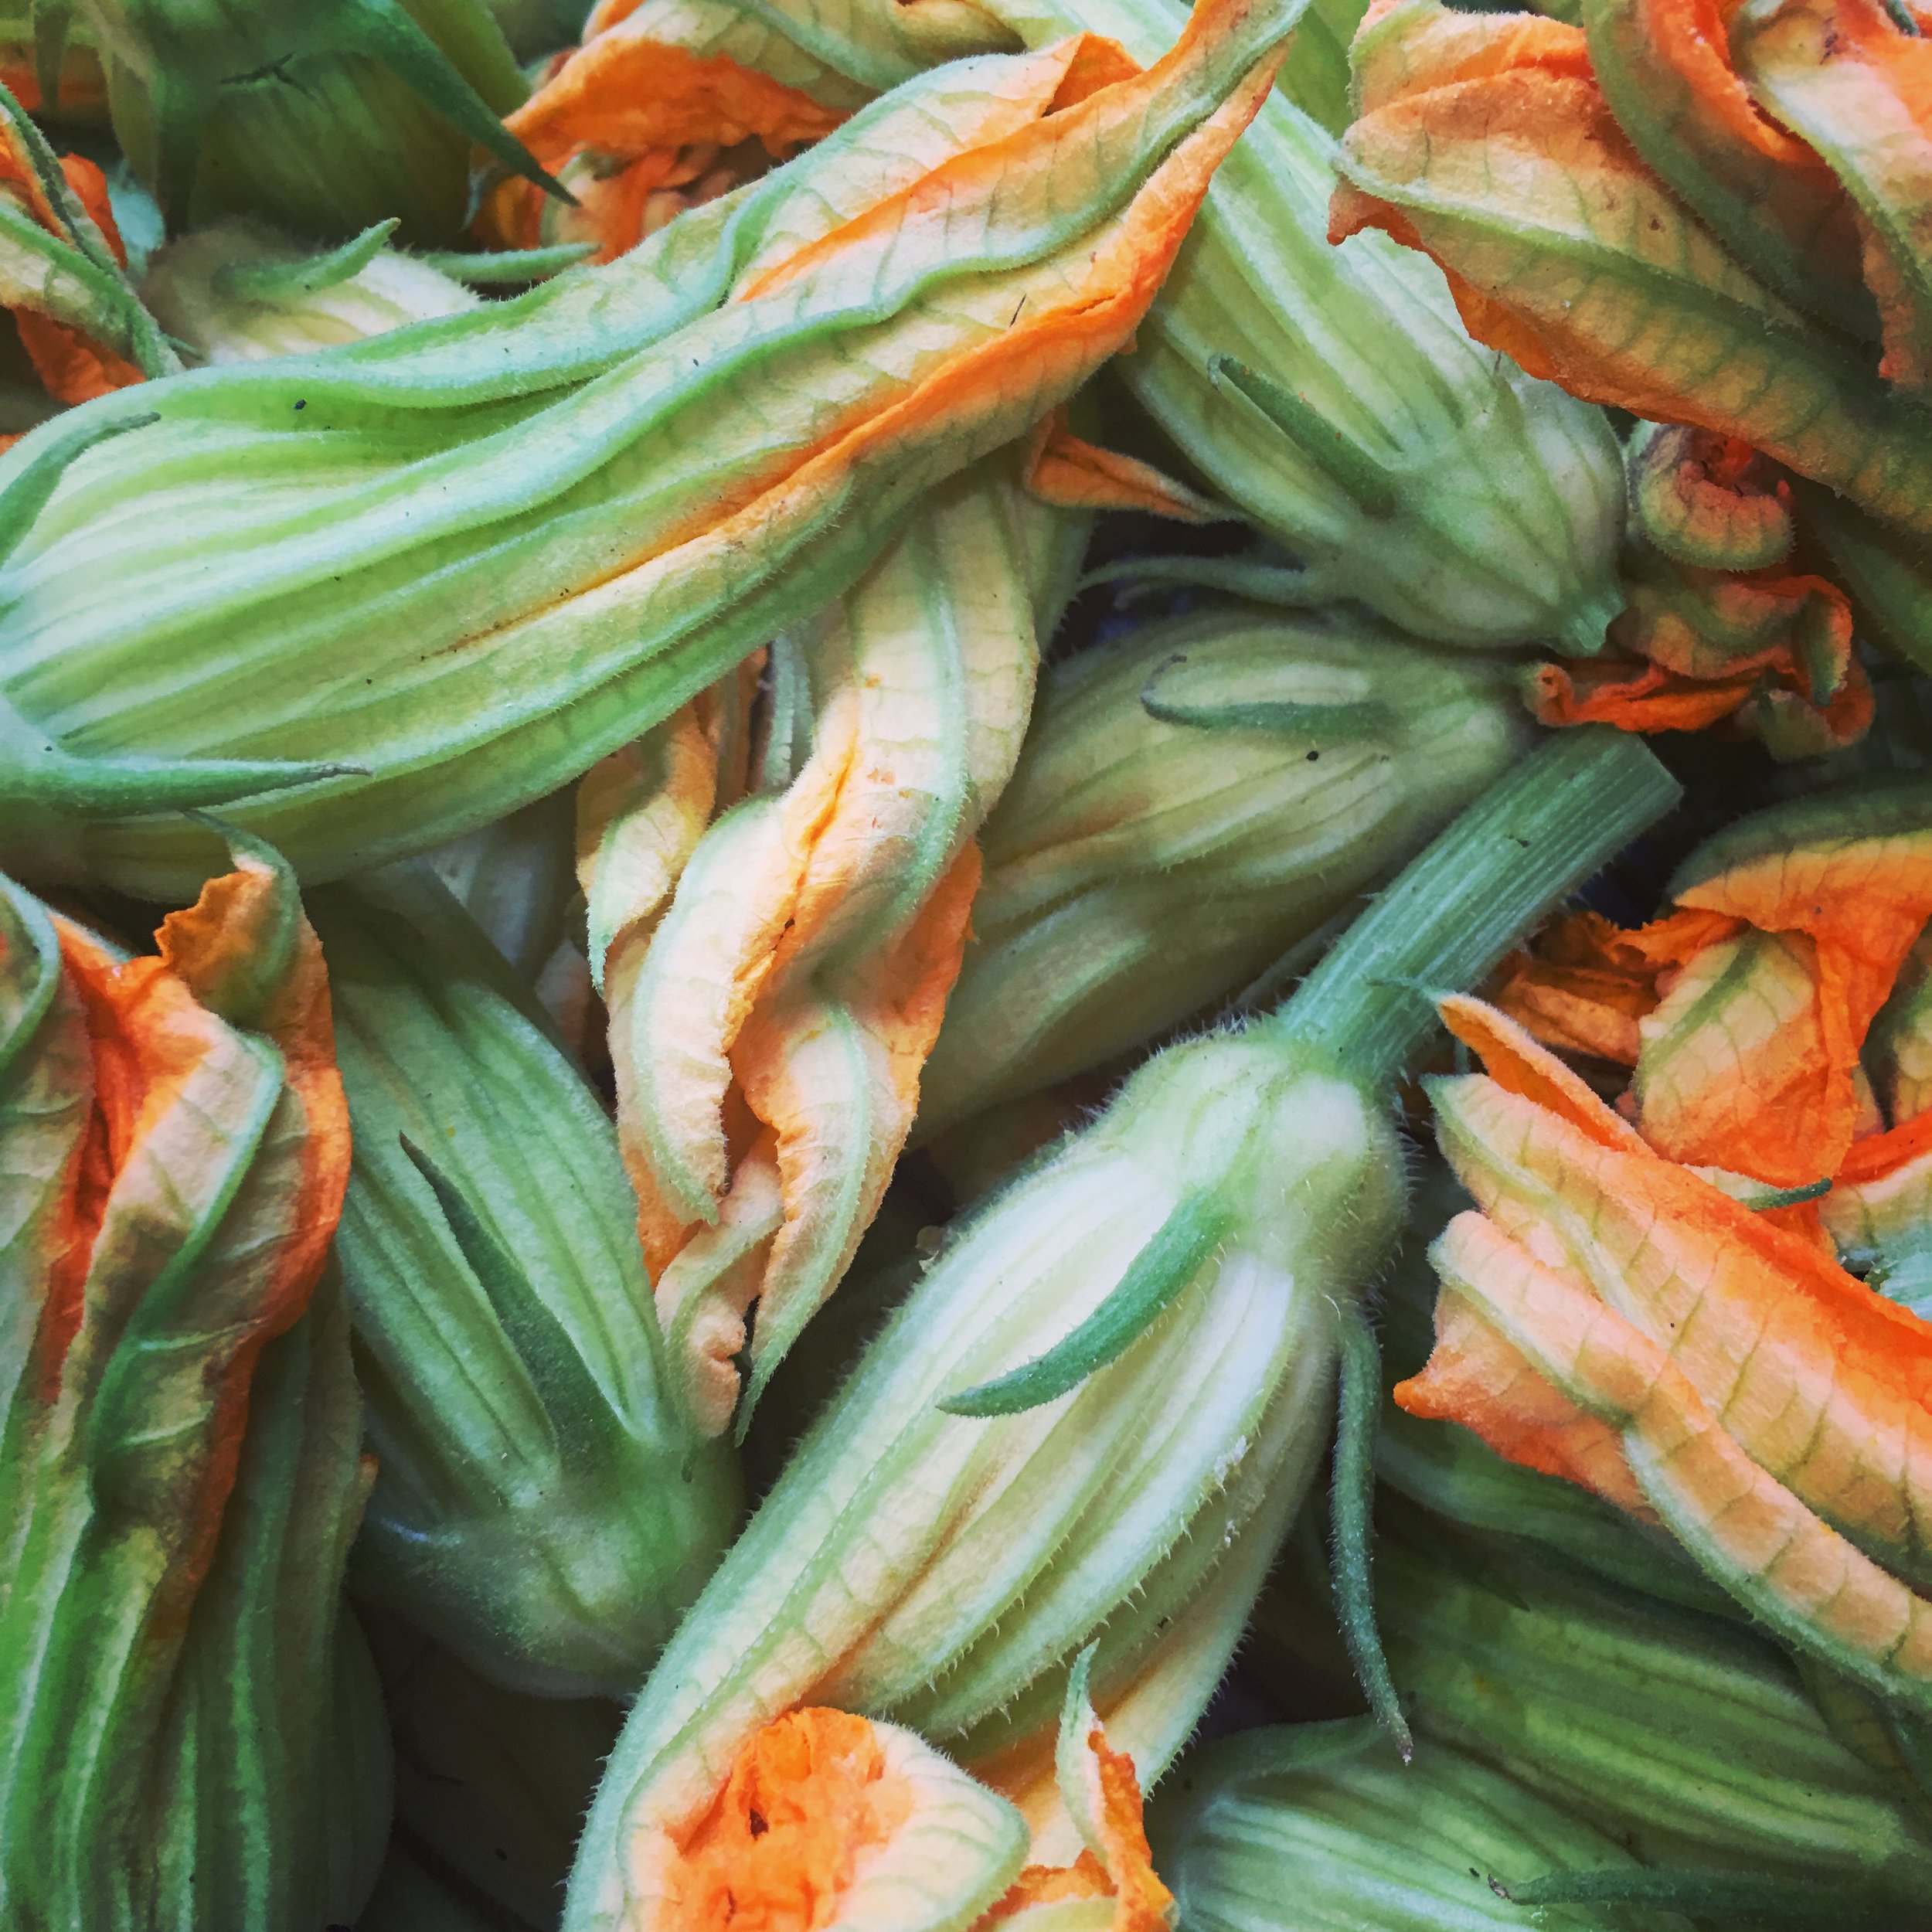
I love squash blossoms! Did you know that the entire squash plant is edible?  Many cultures prepare the leaves and peel the stems to use in soups, sautés and curries. So if you don't get the squash when you plant it , it's not a total failure.  The most laborious part of preparing squash blossoms is removing the stamens from the base inside the blossom. Since I'm frying these, and not stuffing them, it doesn't matter if the the flower tears a bit--it'll be dipped in a delicious, savory, crunchy batter soon enough, covering any flaws. 

This is one of the simplest recipes from the State of Bengal in India and one that has been made in my family for generations.  I have adapted the recipe using soda water to create a lighter batter. 

IMG_9320.JPG

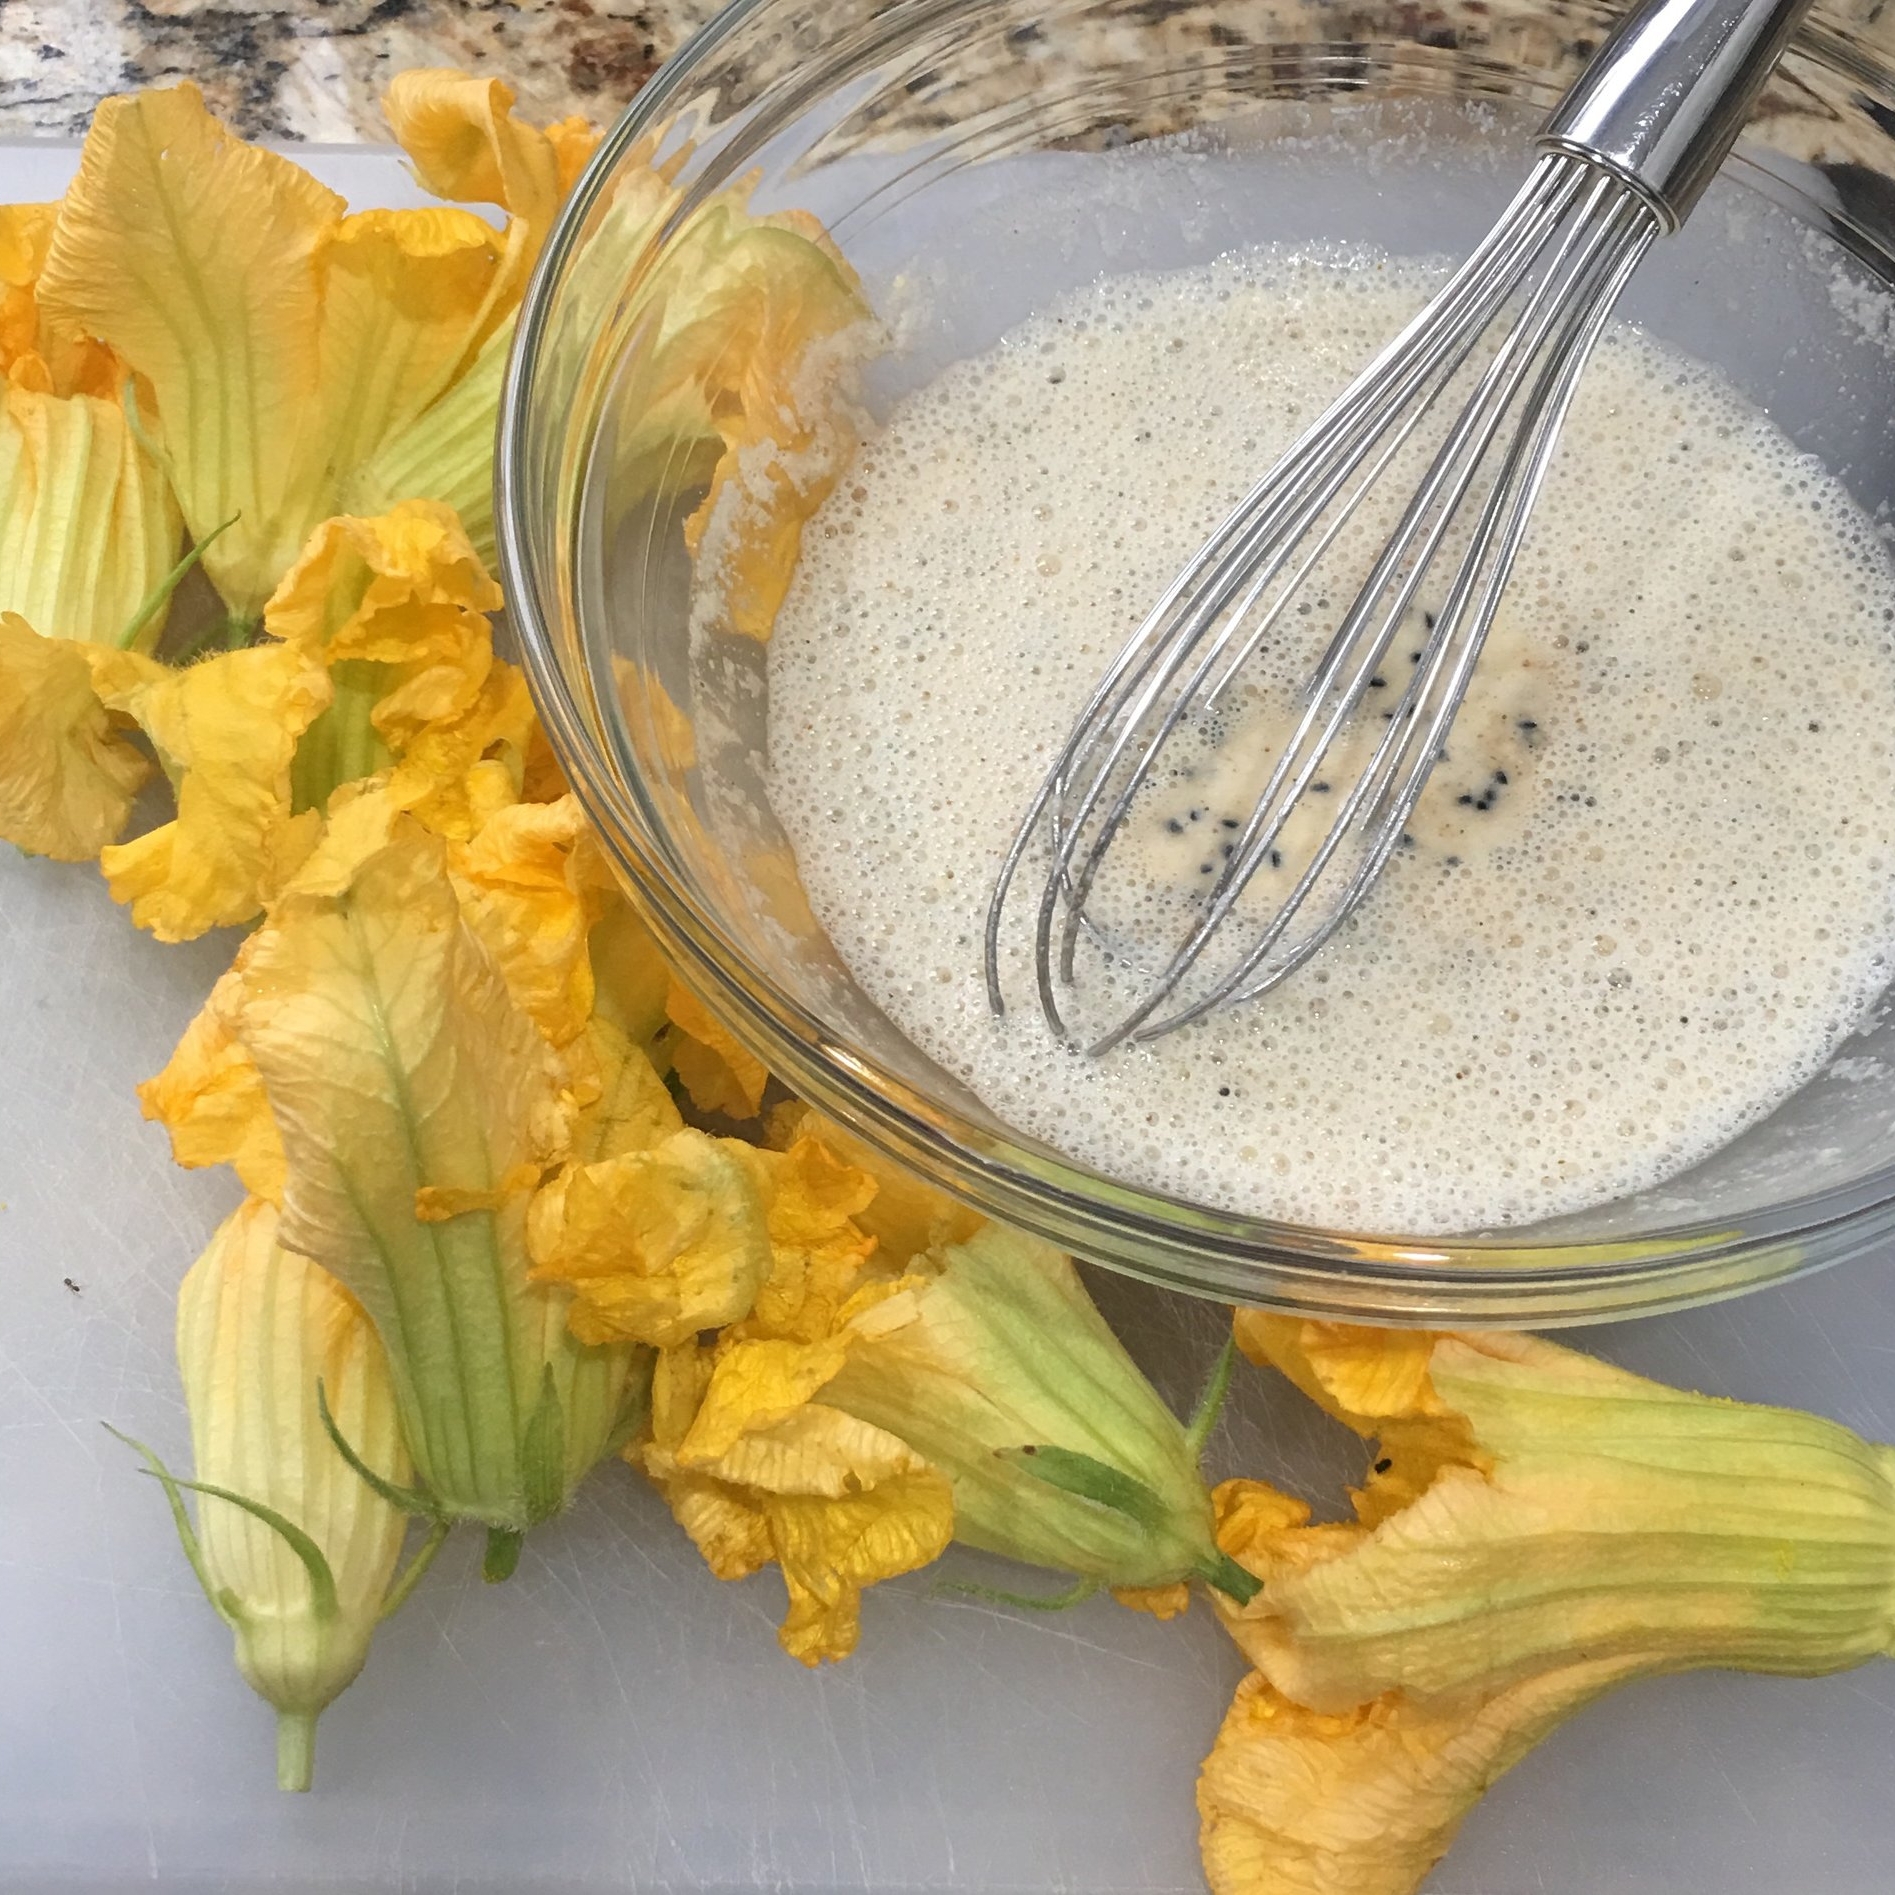
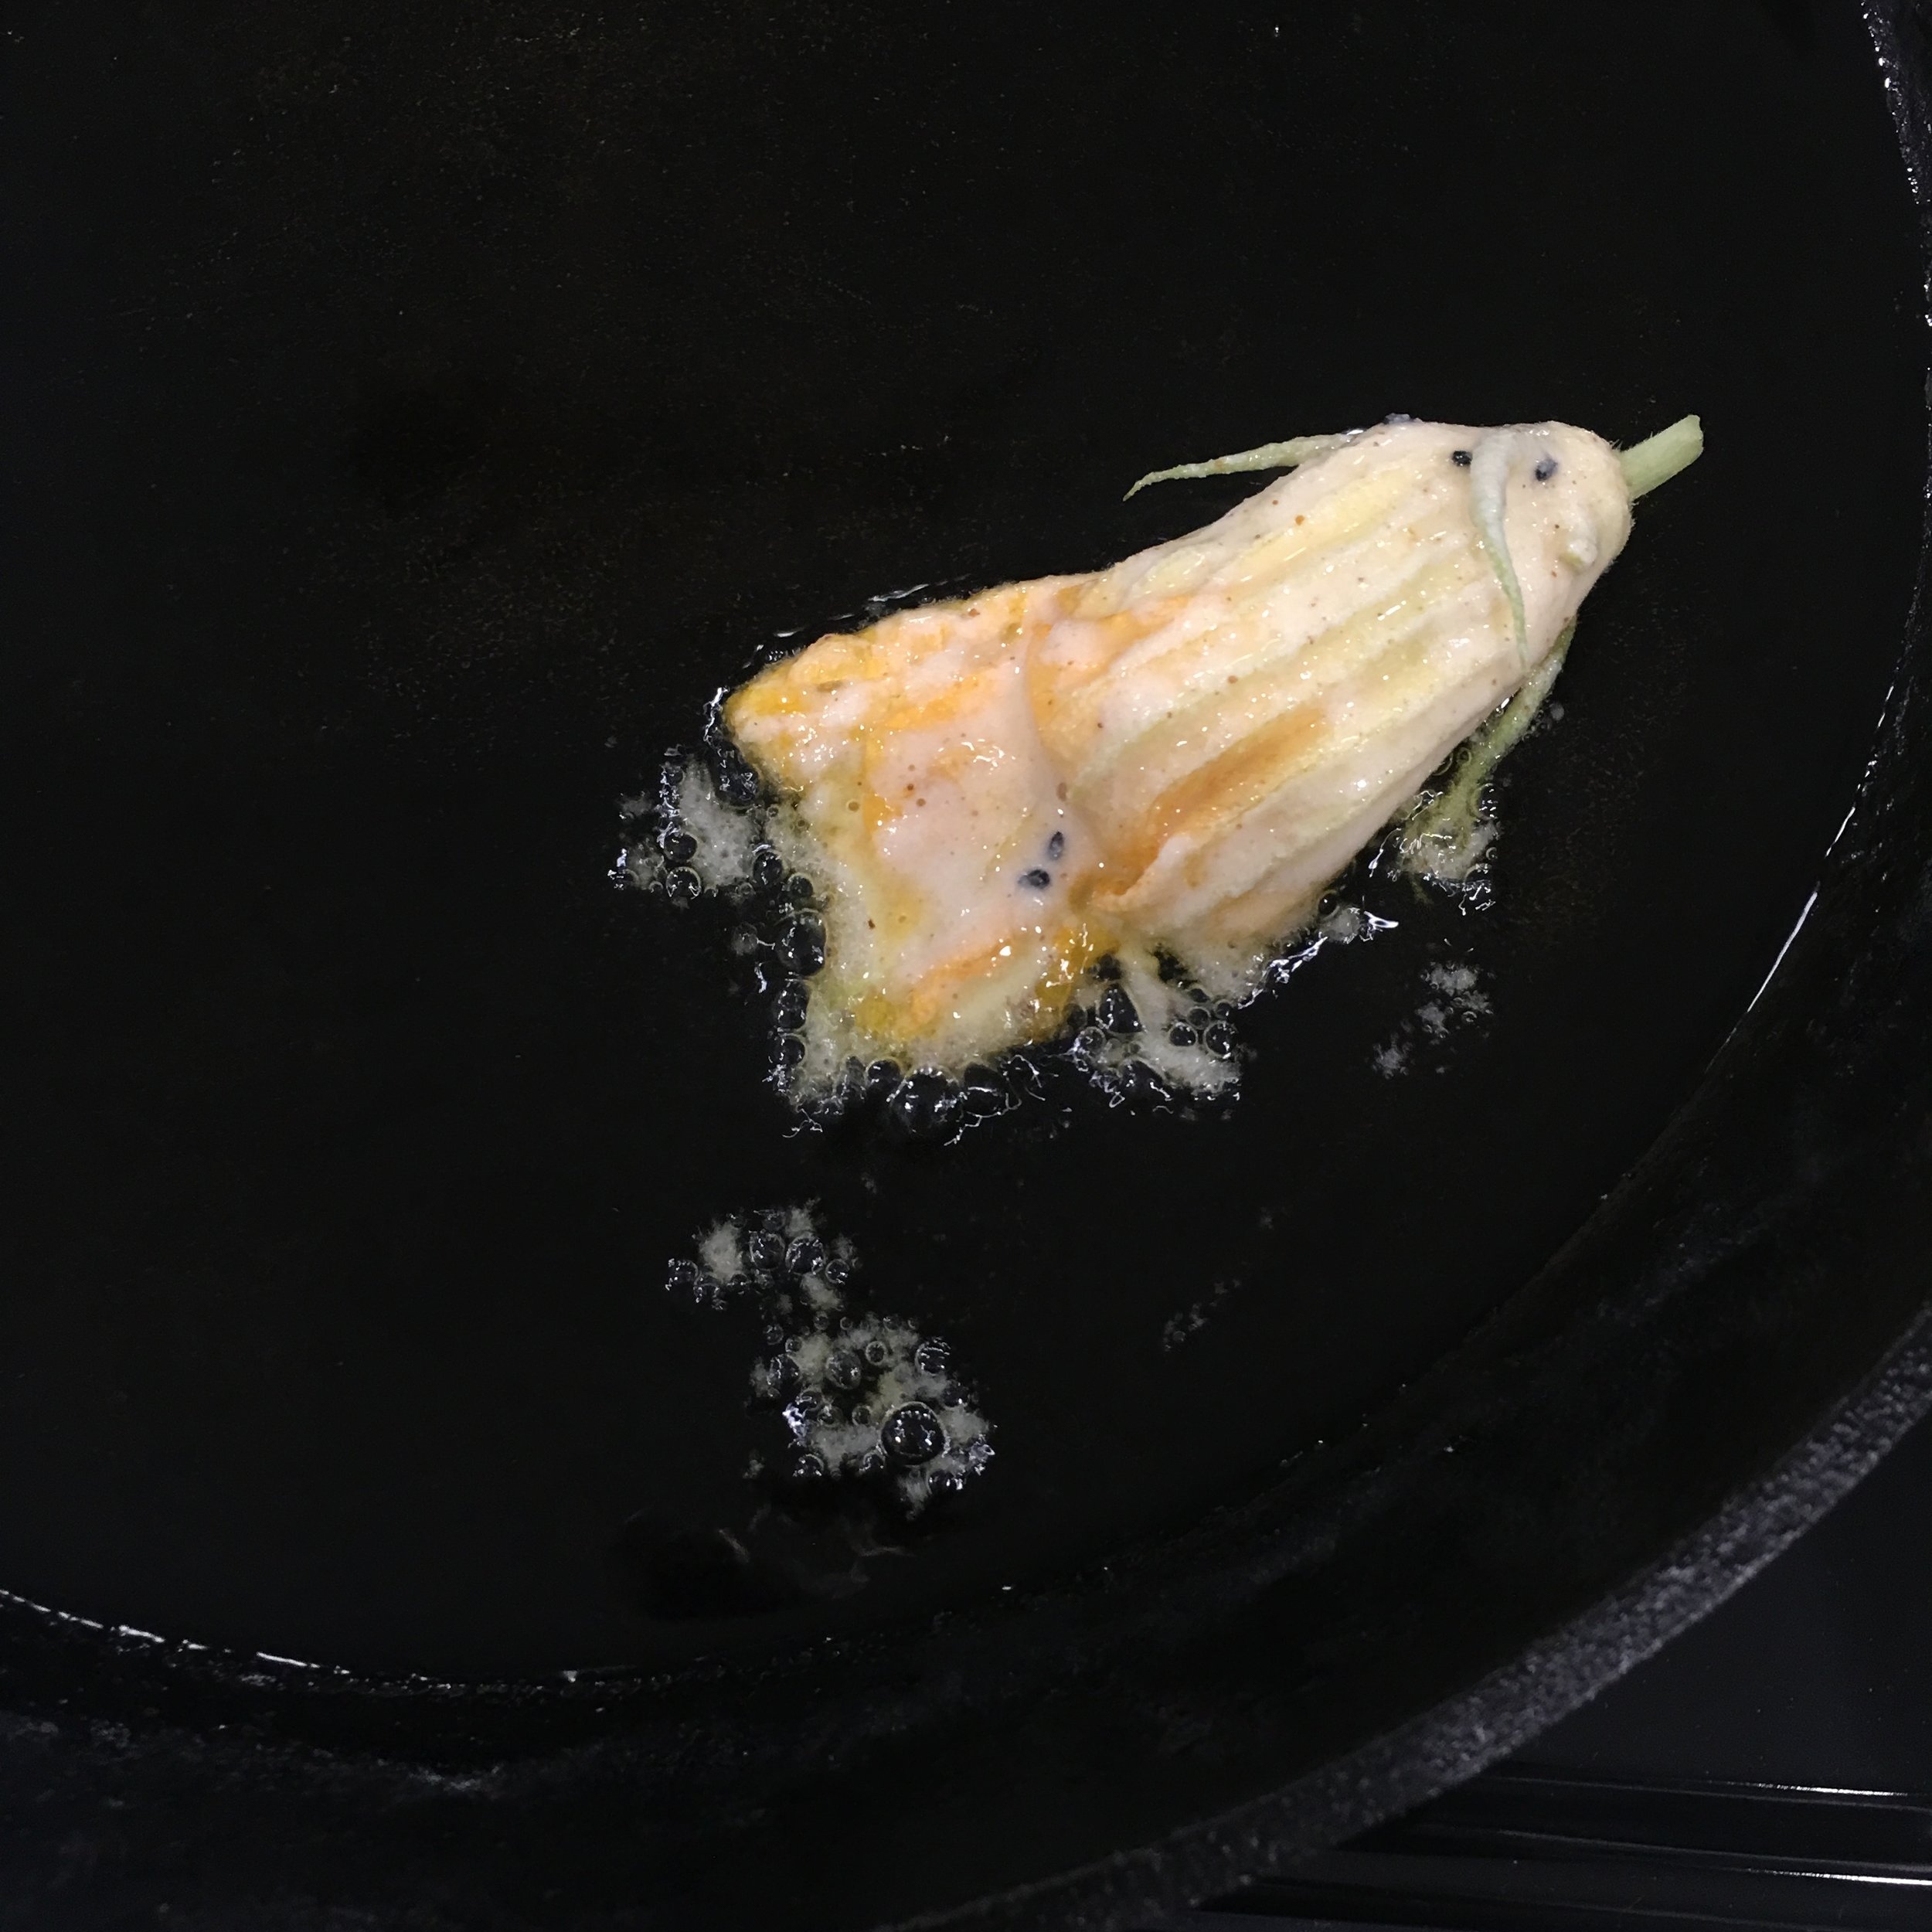
These blossoms have a delicate flavor and this light batter works well. The nigella seed adds a nice mild oniony flavor. The low temperature frying is done in olive oil, a good for you mono-unsaturated fat.  I eat these free of any guilt as they are really good and good for me--all things in moderation of course.

Squash blossoms are an excellent source of vitamins A and C. They offer a good source of iron, potassium, calcium and beta-carotene and are high in fiber.

RECIPE: Fried Squash Blossoms Bengali Style

INGREDIENTS

  • 14-16 blossoms, stamens removed

Batter:

  • 1/4 cup rice flour 
  • 1/8 cup chick pea flour
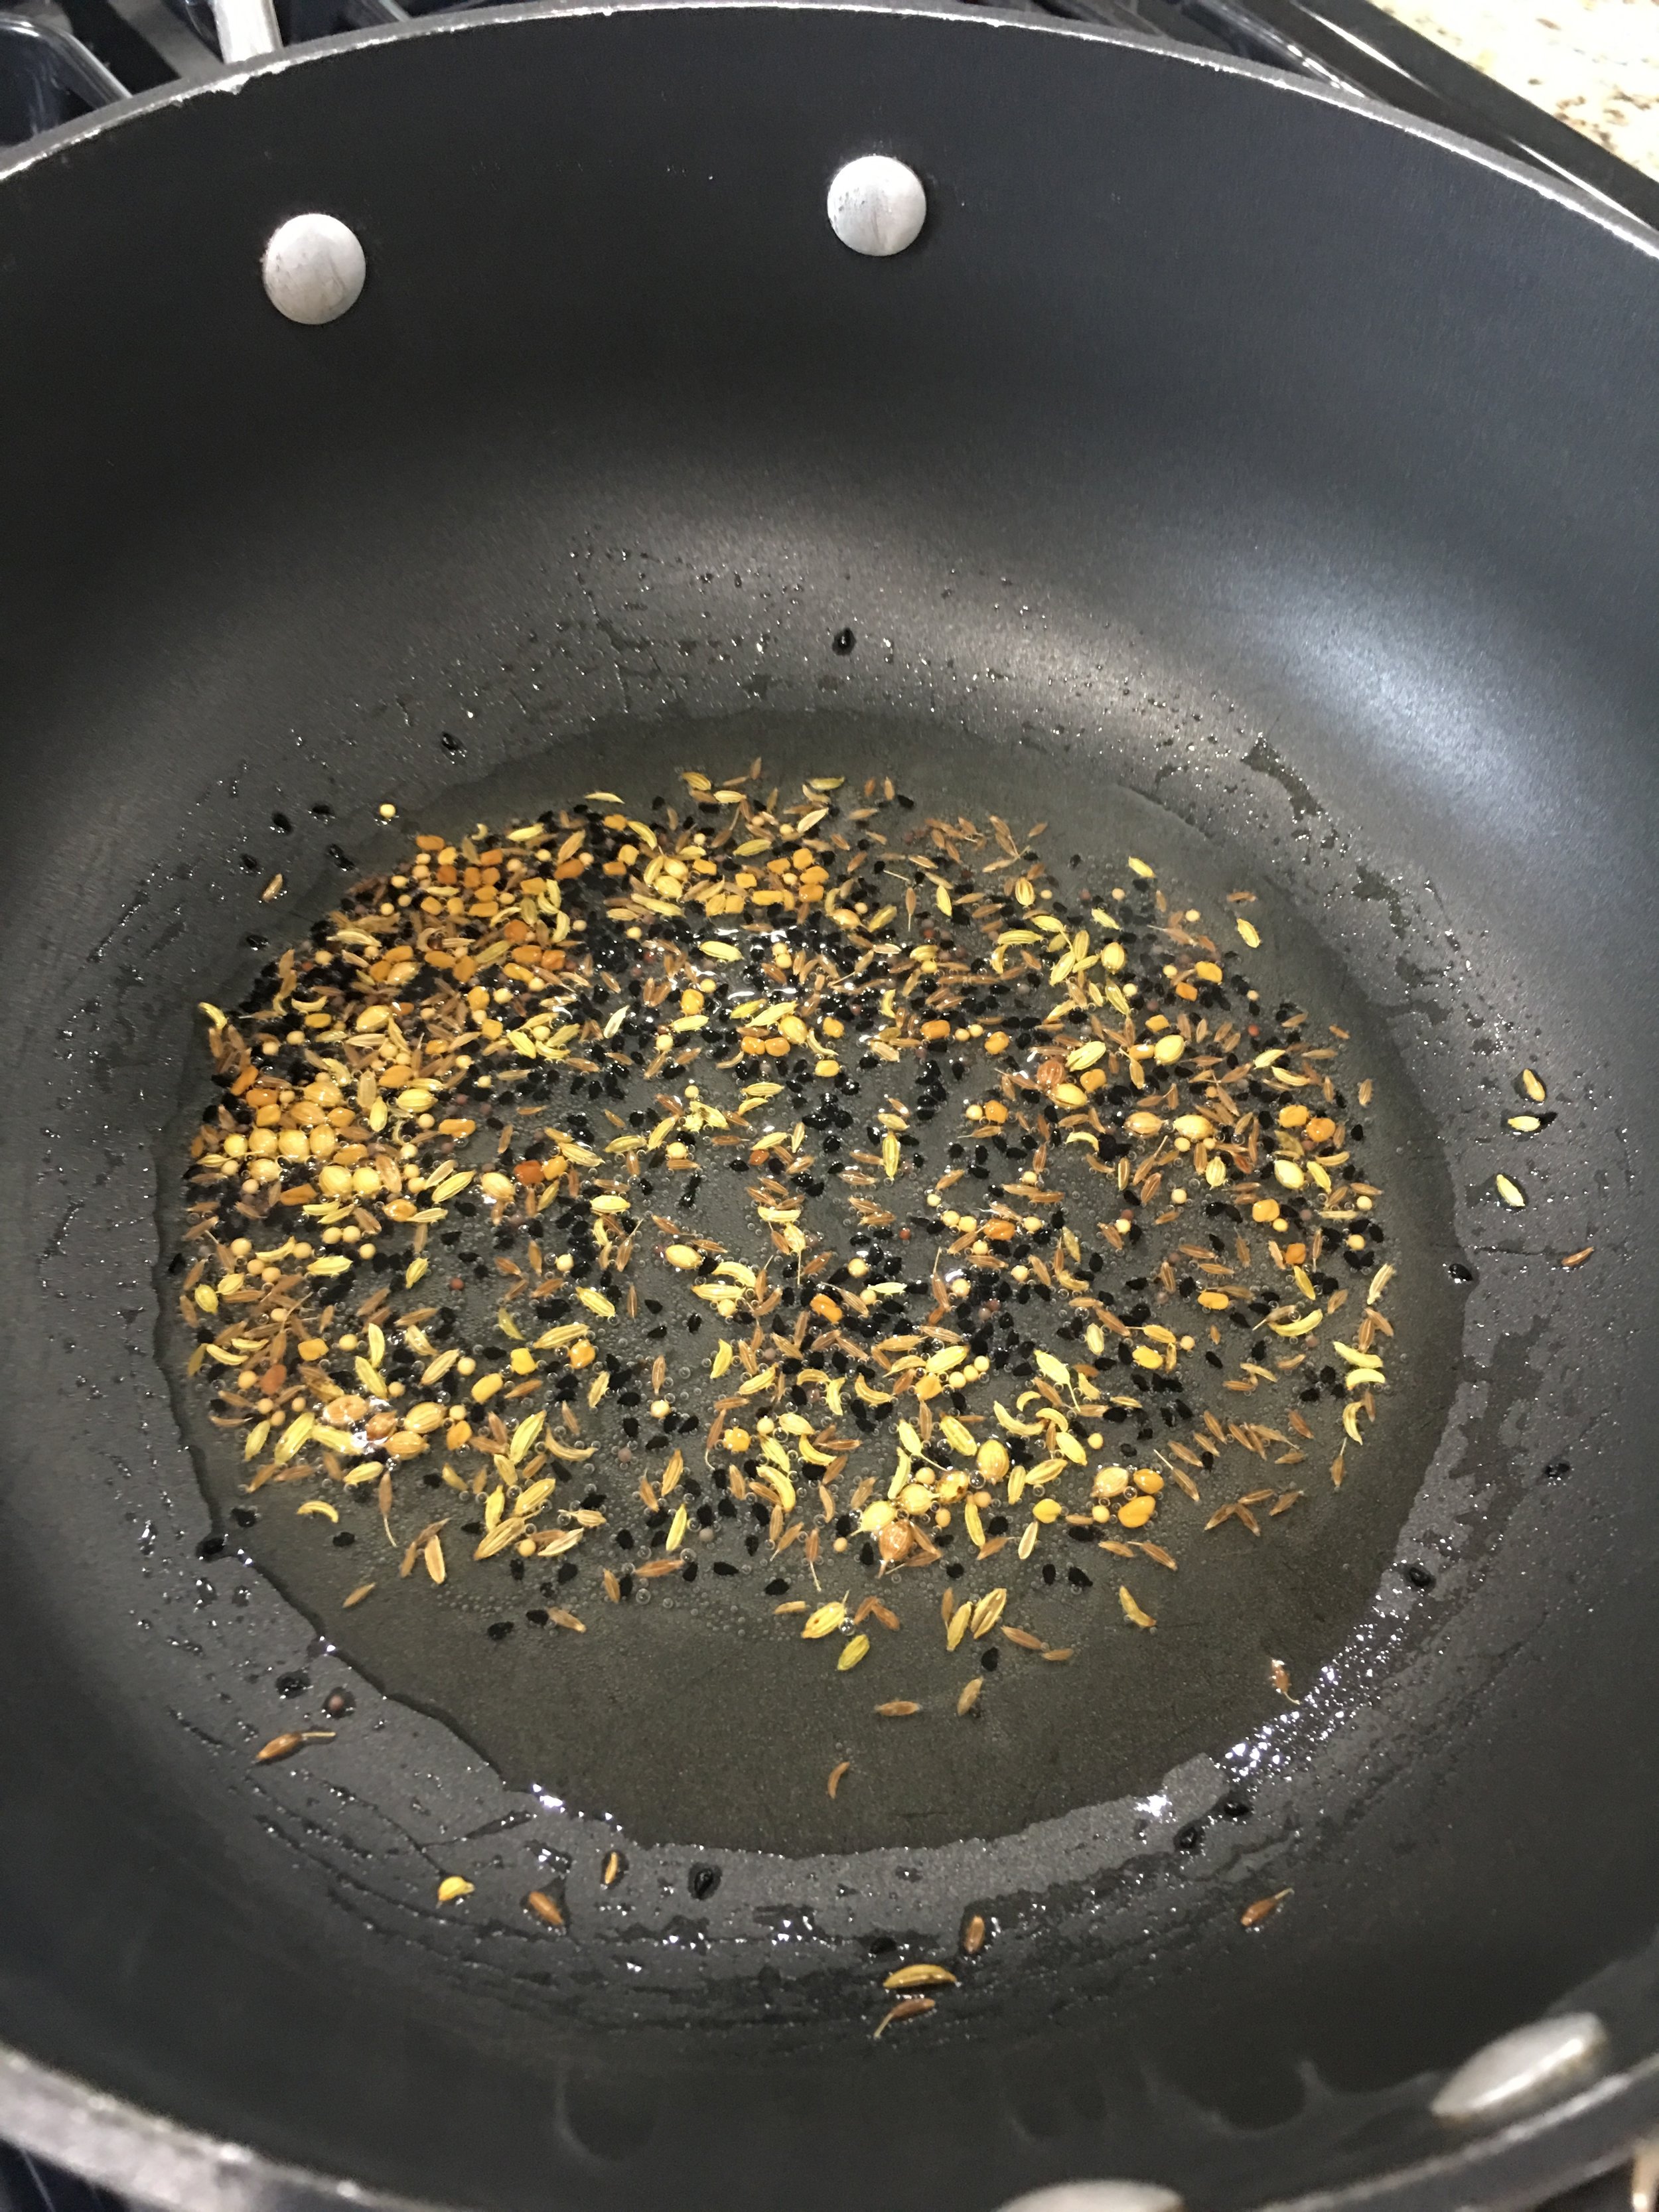
  • 1 teaspoon nigella seeds
  • 1/2 teaspoon sea salt
  • 1/4 teaspoon cayenne 
  • 1/2 cup soda water
  • Extra virgin olive oil for shallow frying

PROCESS

  1. Prepare blossoms by gently shaking off any debris and carefully removing the stamen.
  2. Set a pan on medium heat with 1/4 inch of oil to cover the bottom.
  3. Prepare batter by whisking all ingredients in a bowl.
  4. When the surface of the oil begins to move, hold the blossoms by the base, gently coat with batter and lay into oil with a movement away from you.
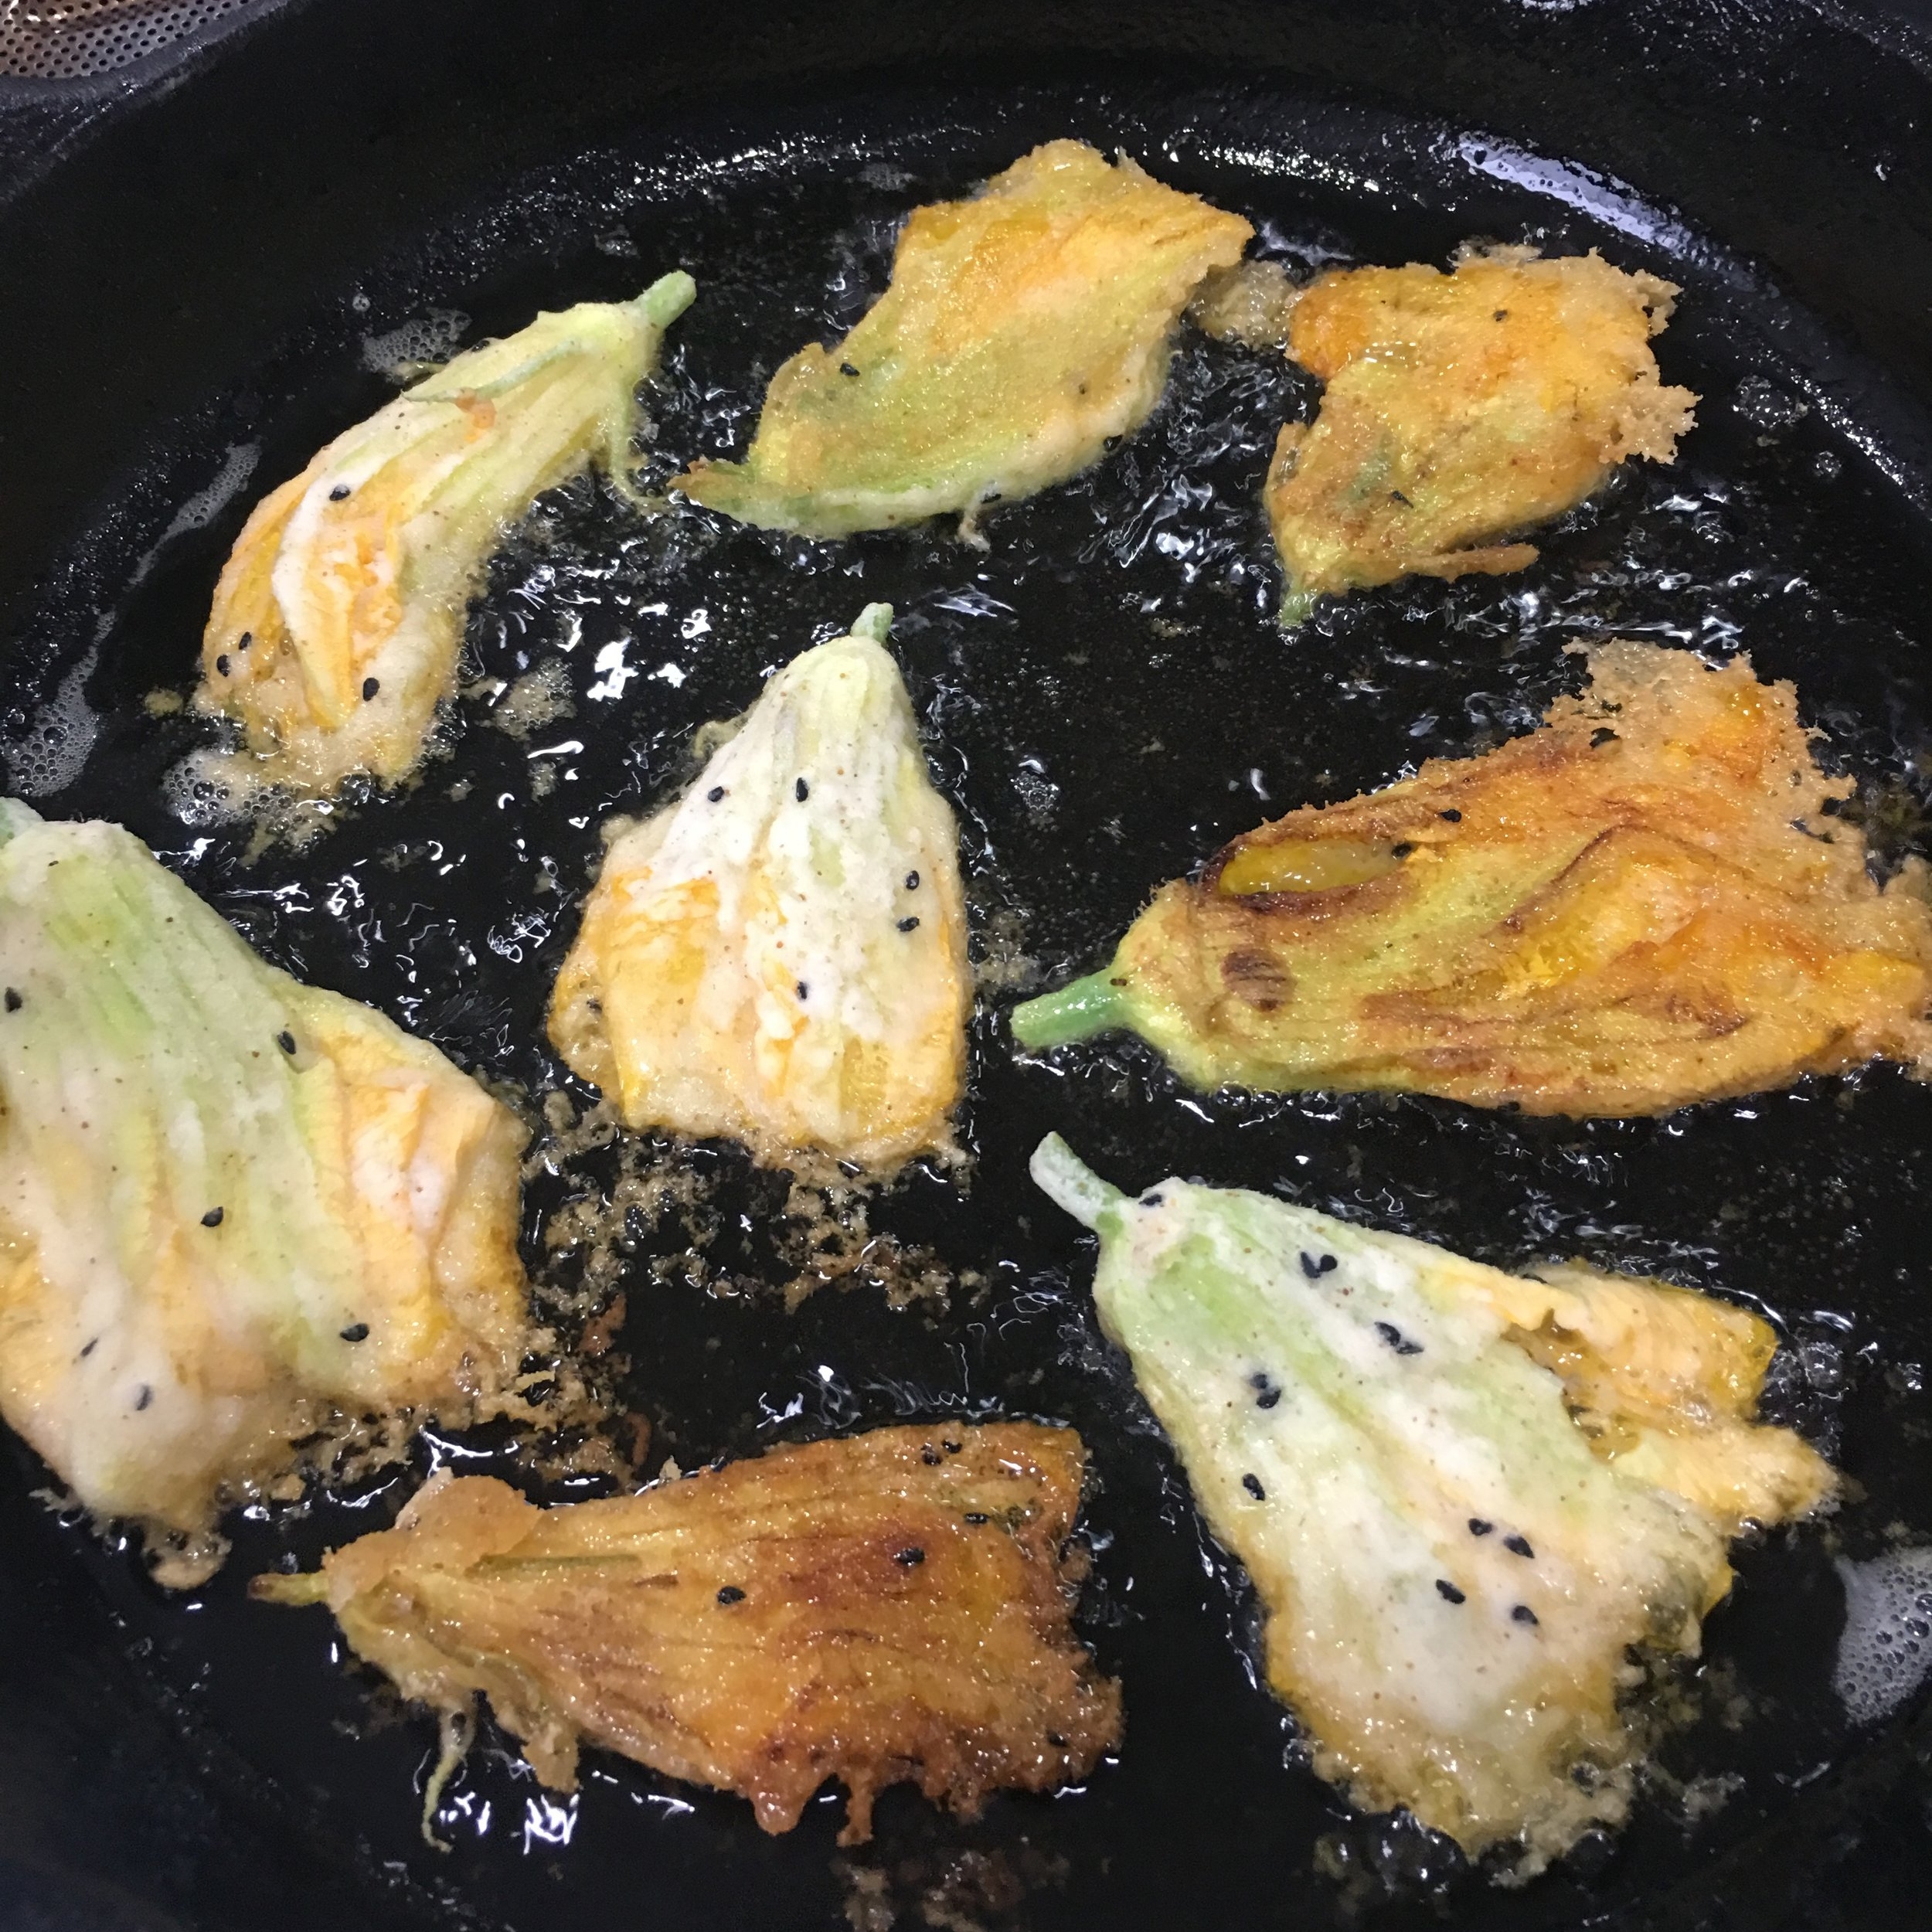
  5.  Fry until golden on both sides. Place on rack or brown paper to drain.

Enjoy at once! They are also delicious at room temperature. 

Can be enjoyed on their own, as a crispy element to a meal, with a cool herbed yogurt or green goddess dip. I love them with a glass of champagne or sparkling rosé.

Quintessentially Summer!


Asian Long Beans with Mustard

One of the delights of living in a diverse community is the variety of produce that's available.  Summer is prime green bean season, and the asian long bean (yard long beans) is variety that I love.  You can certainly substitute it for regular green beans in the recipes you love.  I'm cooking them with a little mustard seed and finishing with mustard oil for a nice, light summer version with a little zing.  This is so easy and fast your kitchen have doesn't have time to heat up.  This recipe is husband approved; it's been requested and prepared for the last several weeks when I can get my hands on the beans!

From a nutrition standpoint, Asian long beans are a rich source of vitamins A,C, calcium and fiber.  The mustard adds some anti-inflammatory properties as well.  The extra virgin olive oil is a healthy mono-unsaturated fat.

You can find black mustard seed and mustard oil at most Asian markets or online.

RECIPE: Asian Long Beans with Mustard Seed and Oil

INGREDIENTS

  • 2-3 cups chopped long beans (about 1/2 inch pieces)
  • 2 teaspoons extra virgin olive oil 
  • 1 teaspoon black mustard seeds
  • 1/2 teaspoon sea salt
  • 1/4 teaspoon cane sugar
  • 1/2 teaspoon mustard oil

PROCESS

  1. Heat mustard seeds in oil until they start to pop
  2. Add the beans, salt and sugar.  Toss to mix and cover the beans for 2-3 minutes until tender.
  3. Drizzle the mustard oil over, toss and enjoy.
fullsizeoutput_16.jpeg

Basic Greens

3EFD0CA2-5459-41AB-8215-E2F199E0FEED.JPG

Greens are good and good for you. I love greens: Swiss chard, spinach, beet, mustard, amaranth, collard, radish, kale and so many others are all great to eat. I also love the leaves of cauliflower, broccoli, and brussel sprouts and cook them in the same manner, chopping the stems and cooking them a little longer.  (I do not use carrot tops as they concentrate arsenic from the soil).  I’m always surprised when people tell me they don’t like greens. They usually haven’t had them prepared in a way they like. The usual method of cooking greens with salted pork or bacon is tasty to many, but takes awhile, and the greens are very, very cooked. My method takes almost no time at all, and results in a light, bright just wilted green that’s delicious, and healthy. 

Greens are packed with nutrition and a great source of fiber. They are rich in iron, potassium, zinc and other minerals.  Amaranth is a rich source of folate, and other B vitamins. Swiss chard and beet greens are rich sources of vitamin A, which is more readily absorbed by the body if eaten with a little good fat, like extra virgin olive oil. Overall, the nutritional profiles of all greens are such that it’s a shame not to have them as a regular part of our meals. They also keep you feeling full with very few calories.

Greens need to be washed well. I soak mine in lots of water in the sink, allowing dirt to sink to the bottom, and then drain (see Food Safety). I separate the leaves from the stems, which I chop and sauté before adding in the greens.  

This is more a method than a recipe and can be adjusted for various quantities as ‘a bunch’ varies tremendously.  Remember, that greens cook down considerably, so start in a large pan. You will end up with a much smaller volume in the end.  Always salt at the end, when you can see the cooked amount, otherwise you’ll usually end up with overly salty and watery greens.

I’m showing rainbow chard here, because that’s what’s growing where I am. It’s also very tender and sweet. And pretty. 

RECIPE: Basic Greens

INGREDIENTS  

  • 1 bunch greens  (washed and chopped, about 8 cups of greens)
  • 1 Tablespoon extra virgin olive oil
  • 1/2 teaspoon red pepper flakes (optional) 
  • 1 teaspoon vinegar (I like champagne and cider) 
  • Salt and Pepper

PROCESS

  1. Heat oil in large pan with pepper flakes. 
  2. Add the stems and sautee for 3-4 minutes to soften. 
  3. Add greens and toss to wilt and cook through.
  4. Add vinegar, salt and pepper to taste and toss to evenly distribute. 

Makes 4 servings.

Pasta with Light Tomato Sauce

fullsizeoutput_1c9c.jpeg

It’s tomato season where I live! This year, after hurricanes, freezes, and 2 snowings (most unusual for us), the tomato crop is more plentiful than ever. As a result, I’m inspired to create new tomato sauces.  This one is light and aromatic using fennel and mild herbs. No need to peel or core the tomatoes, just chop them up.  The addition of white wine helps to meld the flavors as the alcohol cooks away. This sauce also cooks in the time it takes to make the pasta, which is perfect.

The tomatoes are truly the star here, so freshness is important.  I have also used a good quality pasta made with ancient wheat from Italy as the sauce is light and the taste of the pasta is important. Several artisanal varieties using heritage American wheats are also available online. Or, just use your favorite dried pasta. 

This dish is rich in vitamins A, C, B1, B2, B6, folate, niacin, potassium, manganese, several other nutrients, minerals and fiber.  The pasta also contains some protein. You can add a little cheese if you like, for calcium.

RECIPE:  Pasta with Light Tomato Sauce (white wine, fennel, marjoram, thyme) 

INGREDIENTS

  • 1-1/2 lb tomatoes, chopped (I used San Marzano, but plum or Roma would be fine)
  • 1 cup finely chopped fennel 
  • 2 tsp extra virgin olive oil
  • 1/2 tsp salt
  • 1/4 tsp ground black pepper
  • 1/2 tsp red pepper flakes 
  • 1/2 cup dry white wine
  • A few sprigs each, marjoram and thyme 
  • 1/4 cup fresh parsley
  • 1/4 cup fresh basil
  • 250 grams (dry weight) noodles, just undercooked as they will finish cooking in the sauce (I used tortiglioni here, but penne with ridges would be perfect)

PROCESS

  1. Cook the pasta according to the directions in salted water while you prepare the sauce.
  2. Heat oil in pan with the pepper flakes.
  3. Add the fennel and sauté for about 3 minutes to soften.
  4. Add the tomatoes, wine, salt, marjoram and thyme. Simmer gently for 8-10 minutes.
  5. Drain the pasta, add it to the sauce and toss. 
  6. Add the parsley and basil and toss again.
  7. Serve immeidately

Serves 4 (or 2 with generous portions)

fullsizeoutput_1ca3.jpeg
fullsizeoutput_1ca1.jpeg

Easiest Green Beans Ever

Bright green and just tender

Bright green and just tender

Don't you just adore bright, sweet, just cooked through green beans? They are almost universally loved. But who wants to go through the blanching and shocking and then sautéing? Here's an easy way to cook green beans and use them in salads, pasta dishes or just pick them up and eat them.

Green beans are an excellent source of multiple vitamins, minerals and fiber.  The addition of the little bit of extra virgin olive oil, a good fat, helps absorption of vitamin A and several minerals.

Once again, I will take the time to advocate for local farmers’ markets. The green beans in the supermarket are cold stored and lack the nutrition and sweetness of those that are fresh picked. Once you’ve had a really fresh, sweet green bean, there’s no going back to the cold stored variety. This is true of all produce, but you’ll have to taste the difference yourself to become a believer.

This is my easy 1 pot short cut to perfect green beans.

RECIPE: Simple Green Beans

INGREDIENTS

  • 1/2 lb green beans
  • Salt & Pepper
  • 2 Tsp water
  • 1 tsp extra virgin olive

PROCESS

Place all ingredients in a covered flat pan over medium heat. Simmer for 5 minutes until beans are bright green and just tender. Uncover.

Serves 4

 
Before

Before

After

After


Pasta with Fresh Tomato Sauce (San Marzano)

The first crop of good tomatoes finally made it to the farmers’ market. And to my great surprise, I found that my Plant It Forward farmer, Sarment had San Marzano tomatoes in his basket.  According to Wikipedia, San Marzano tomatoes originate from the small town of San Marzano sul Sarno, near Naples, Italy, and were first grown in volcanic soil in the shadow of Mount Vesuvius. If I have to use canned tomatoes, these are the only ones I use.

These San Marzanos  were grown in Houston, with no volcanic soil in sight. But everything Farmer Sarment grows is delicious.  So I bought a few intending to showcase them in a no-cook tomato sauce as we hit our first 90 degree days for the year.

Using the best and freshest ingredients in this dish is a must as each flavor shines and nothing is hidden.  Using store bought tomatoes that have been held in cold storage for several weeks with no flavor, aroma or taste, is not advised.  Fresh tomatoes from your garden or a local farmers’ market are the best choice.  The olive oil should also be very good quality and have a rich flavor. For this recipe I use Iliada Organic Extra Virgin Kalamata Olive Oil (you can usually find this in import markets or online).  The pasta also deserves some attention.  I prefer a dry pasta here as it lends some tooth to the soft texture and lightness of the sauce, and using a good organic wheat variety is warranted. Use fresh pasta if you prefer.  The parts blend together to form a simple, delicious dish.  The sauce is extremely light and flavorful.  The tomatoes macerate in the oil and lend their flavor to the sauce without fully breaking down, so its really more of a tomato oil that coats the pasta with lovely bits of tomato along with it.  A little crusty bread will help you lap up every last drop.

The olive oil helps us absorb the vitamin A from the tomatoes. The tomatoes are also a rich source of vitamin C and lycopene.  The pasta provides magnesium, several B vitamins, including thiamine (B1), which are necessary for brain health and memory.

As spring gives way to summer, what better way to lighten our spirits and our dishes than avoiding time at the stove.  Just a pot to boil the pasta and a big bowl to macerate the tomato sauce is all you’ll need to get a healthy and delicious meal on the table. 

RECIPE: Pasta with Fresh Tomato Sauce

INGREDIENTS

  • 24oz fresh tomatoes,  finely chopped (preferably plum or San Marzanos if you can find them)
  • 1 bunch/handful fresh basil
  • 1 tsp sea salt
  • 1/2 tsp freshly cracked black pepper
  • 1/2 C extra virgin olive oil (the good stuff)
  • 8 oz (dry weight) organic spaghetti/fettuccine cooked al dente in salted water 
  • Freshly grated parmigiano regiano for serving

PROCESS

  1. Combine all ingredients in a large bowl (big enough to fit the pasta and toss)and let sit for at least 30 minutes and up to 2 hours. The longer it sits the better it gets.
  2. Add the well-drained cooked pasta and toss. Serve topped with grated parmigiano regiano, and a few more basil leaves.

Serves 2-4


Tricolor Vegetables w Bengali 5 Spice (panch phoran)

E5A6C0E2-0E22-493B-B497-EB97F5BF2F04.JPG

One of the many joys of seasonal cooking is embracing doing the best with what you’ve got. Such is my journey with purple cabbage. I don’t give it much thought at all. I look at it and immediately think cole slaw.  But Sarment, one of the farmers I visit every week knowing everything he grows is delicious, had several adorable little purple cabbages a few weeks ago. He also had gorgeous Swiss chard and the usual divine sweet potatoes. These items came home with me and became the inspiration for this dish. 

I have been making this regularly and eating it with a side of Greek yogurt as lunch. It’s lovely to look at, and the purple cabbage retains its color and crunch to balance against the gently wilted chard and creamy sweet potatoes. Everyone, especially children, are always interested in this dish. It’s appealing.

I have used an Indian spice mix here as it is round in taste, flavorful, mild and compliments the vegetables. It’s a particularly good complement to cabbage. Traditionally used in the Indian state of Bengal, panch (five) phoran (whole spice) is a mix containing fennel, nigella(onion seeds), mustard, fenugreek and cumin. It is used in a old vegetable dish popular in Bengali households called chachori, where no part of any vegetable is wasted. This tradition is being slowly lost in favor of more sophisticated foods, but it’s too delicious not to rescue.  You can also use coriander in place of the cumin.  You can make your own (equal parts of each) or buy it online.  Spices have medicinal and health properties that have been studied in Ayurvedic medicine for centuries. This blend contains spices that act as anti-oxidants and are believed to reduce inflammation. 

Something this beautiful, easy and delicious makes cooking a delight. Serve it as a side dish, eat with a piece of bread, a small bowl of rice, or with yogurt (like me).  I hope you will enjoy it as much as I do.

RECIPE: Tricolor Vegetables with Bengali 5 Spice

INGREDIENTS

  • 2 tsp panch phoran
  • 1 Tsp expeller pressed canola
  • 3C chopped sweet potatoes
  • 3C chopped purple cabbage
  • 1 C chopped Chard stems
  • 4C chopped Chard leaves
  • 1 tsp salt
  • 1/2 tsp cayenne (more to taste)
  • 1/4 tsp turmeric

PROCESS

  1. Heat spices in the pan slowly with oil until the mustard seeds just start to pop.
  2. Add the sweet potatoes and remaining spices and sauté for 2-3 minutes, covering occasionally.
  3. Add the cabbage, toss, and cook covered for 3-4 minutes.
  4. Add chard stems and cook covered 3-4 minutes.
  5. Add the chard leaves and toss to gently wilt.  

Adjust seasonings and enjoy.   Serves 4.